Inserting, Updating, and Deleting Records in SQL Server
Now that you’ve learned how to query data using SQL Server Management Studio (SSMS), it’s time to dive into modifying your databases. In week 2 Day 2 of our Database Decoded series, we’ll explore how to insert new records, update existing data, delete entries, and ensure data safety using transactions. Let’s get started!
Topics Covered
1. Inserting Data
Adding new records to a table is a fundamental task in database management. Use the INSERT INTO statement to add data to specific columns.
Example: Add a New Employee
INSERT INTO Employees (EmployeeID, FirstName, LastName, Department, Salary)
VALUES (4, 'Bob', 'Williams', 'Finance', 62000.00);

Explanation:
Specify the columns you want to populate (
EmployeeID,FirstName, etc.).Use
VALUESto define the corresponding data.Always ensure the data types match the column definitions (e.g.,
INTforEmployeeID).
Best Practice: Explicitly list column names to avoid errors and maintain clarity.
2. Updating Records
Need to correct a mistake or update information? The UPDATE statement lets you modify existing data.
Example: Give a Salary Raise to the Finance Department
UPDATE Employees
SET Salary = Salary * 1.05
WHERE Department = 'Finance';

Explanation:
SETdefines the column to update and the new value.WHEREfilters which rows to update (critical to avoid unintended changes!).In this case, all Finance employees receive a 5% raise.
Warning: Omitting the WHERE clause updates all rows in the table.
3. Deleting Records
Remove outdated or incorrect data with the DELETE statement.
Example: Remove an Inactive Employee
DELETE FROM Employees
WHERE EmployeeID = 3;

Explanation:
DELETE FROMspecifies the table.WHEREidentifies the exact row(s) to delete (use a unique identifier likeEmployeeID).
Critical Tip: Always back up your data before running DELETE statements.
4. Transactions: Ensuring Data Safety
Transactions allow you to group operations and undo them if something goes wrong. Use:
BEGIN TRANSACTION: Start a transaction.COMMIT: Save changes permanently.ROLLBACK: Undo changes if errors occur.
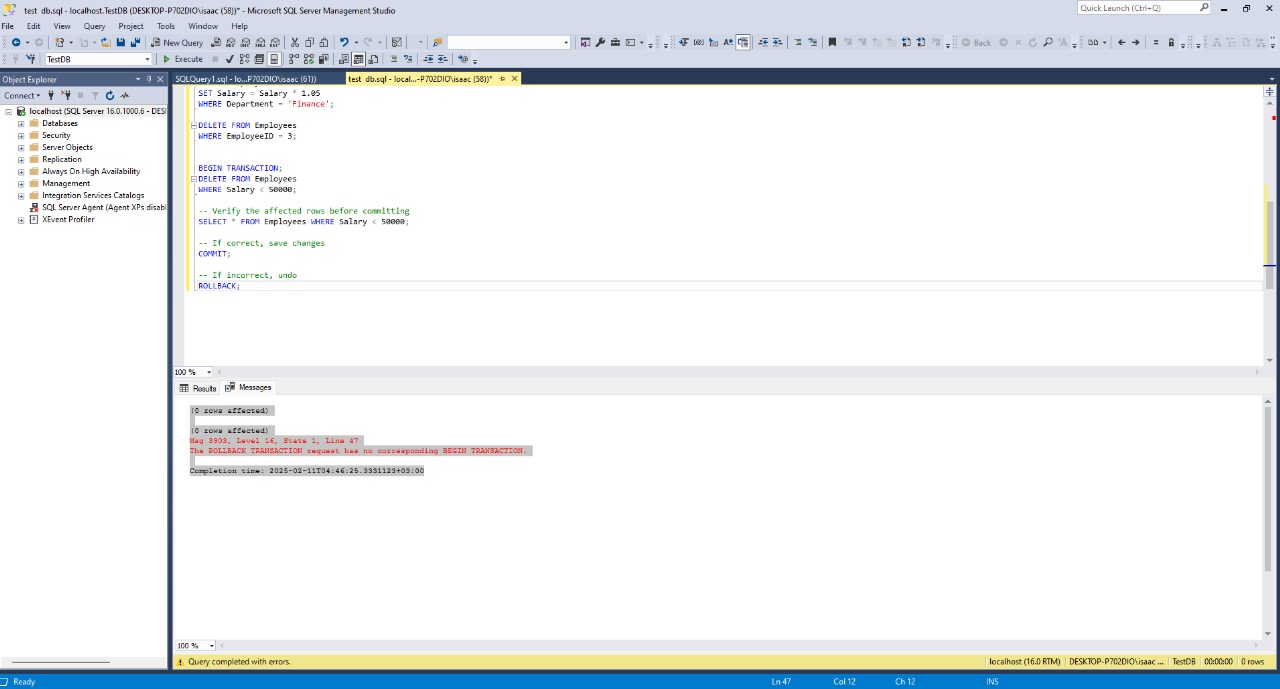
Example: Safe Deletion with a Transaction
BEGIN TRANSACTION;
DELETE FROM Employees
WHERE Salary < 50000;

-- Verify the affected rows before committing
SELECT * FROM Employees WHERE Salary < 50000;

-- If correct, save changes
COMMIT;

-- If incorrect, undo
ROLLBACK;

Why Transactions Matter:
Prevent accidental data loss.
Ensure data consistency (e.g., if part of a multi-step operation fails).
Practice Tasks
Test your skills with these hands-on exercises:
Task 1: Update Jane Smith’s Department
Jane Smith has moved to the Engineering department. Update her record:
-- Write your query here Hint: Use her EmployeeID or FirstName/LastName in the WHERE clause.
Task 2: Delete Low-Salary Employees (Safely!)
Delete all employees with a salary below $50,000 using a transaction:
Start the transaction.
Delete the records.
Verify the changes with a
SELECTstatement.Commit or rollback based on your verification.
Key Takeaways
Insert: Use
INSERT INTOto add new rows to a table.Update: Modify data with
UPDATEand always include aWHEREclause.Delete: Remove records cautiously with
DELETEand use transactions for safety.Transactions: Protect your data with
BEGIN TRANSACTION,COMMIT, andROLLBACK.
What’s Next?
In Day 3, we’ll explore table relationships, including primary keys, foreign keys, and joining tables with INNER JOIN. Practice today’s tasks to solidify your skills!
Pro Tip: Experiment with the Employees and Departments tables you created in Day 1. Try inserting sample data, updating departments, and deleting dummy records.